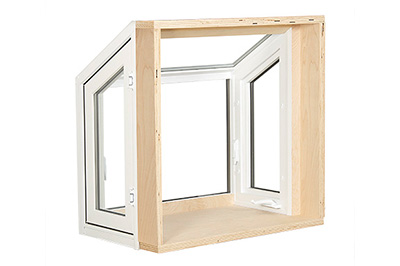
Create a mini greenhouse in your kitchen by installing a garden window over your sink. If your kitchen faces the sun, a garden window as a great place to grow plants and herbs. Your new miniature greenhouse will allow more natural light to enter the kitchen and make it feel larger. Upon completion your new garden will be at your fingertips.
Garden Window Installation Steps:
Remove the Existing Window: Carefully remove the old window and screens. For larger windows use a spare set of hands to avoid injury.
Remove the Exterior Trim: Use a knife to cut through the caulking around the existing window frame. Using a small pry bar; loosen the exterior trim around the existing window frame. All four sides must be removed.
Remove the Existing Window Frame: Use a claw hammer or nail removing tool to pry the nails that are securing the window frame to the existing wall studs. The nails may be difficult to find if they are covered in putty and paint. You can use a magnet to locate them. Once all of the nails are removed you can gently tap the frame out with a small hammer.
Install Finishing Strips: Clean up the rough opening with a putty knife. Install 1×6 finishing wood on all four sides, to dress out the opening. The strips need to be trimmed to suit your specific installation.
Trim the Siding: Use a small skill saw to trim back the siding to expose the 2×4 framed opening. The garden window assembly will attach directly to the studs. Be sur to wear safety glasses during this step to protect your eyes.
Install Flashing: Install flashing to waterproof the opening. Fill all gaps with caulking and/or flashing paper.
Install the Garden Window: Attach the garden window assembly to the 2×4 studs using the hardware included in your kit. Be sure to follow the manufacturers detailed instructions.

Install New Trim: Install new trim around the garden window on both the exterior & interior. This could be standard window trim or simple 1 x2 wood strips.
Final Caulking: Fill all gaps around the new trim with a quality, exterior caulking. Be sure to use a paintable acrylic type caulk.
Finish Painting: Allow the caulking to fully cure before painting. Fill all nail holes with wood putty. Apply a generous coat of primer. Once the primer has dried, apply a coat of quality, exterior trim paint.
Dress up your new garden window with fancy pots to grow an herb garden or your favorite springtime flowers. Enjoy!
Contact Us:
Thinking about adding a garden window to your kitchen? Give us a call! Contact One Source Renovation, LLC at WindowRepairGuy.com or give us a call at (815)-634-8922.