Installing sash locking pins is a great way to improve the security of your windows and prevent a casual thief from entering your home. I mention “casual thief” because a sash locking pin won’t keep out a professional thief who is properly equipped and determined to get inside. What it may do is keep out a local burglar who won’t take the risk of breaking the glass for fear of being noticed. Without the pins installed, in many cases the would-be thief can simply use a knife or thin screwdriver to pry open a standard clasp. This is especially true on older homes where there may be an excessive gap between the upper and lower sash.
Another common use for sash locking pins is to hold the window in the partially open position while maintaining some sense of security. You can establish a safe opening height of 6 inches for instance. With the pin in place the lower sash is locked in position. It’s too low for a small child to fall out. It’s high enough to let in a that fresh spring breeze. Yet low enough that a would-be burglar, enticed by the open window, would be surprisingly thwarted by the security pins. Much to their chagrin.
Yet another advantage of the pins is to overcome problems with annoying windows that won’t stay in the open position. If your counterweights are not functioning properly and your windows close on their own, you can use the pins to keep the lower sash in place. Now you can dispose of the dreaded block, or book that you currently use as a temporary window stop.
Installing Sash Locking Pins on Double Hung Windows
Follow the manufacturer’s instructions for the proper installation of sash locking pins. Generally speaking, with the lower sash in the fully closed position, drill a hole through the upper right hand corner of the lower sash deep enough that the pin will protrude into the upper sash. Usually about 2” deep. Dimensions vary from manufacturer to manufacturer but a common position for the hole is 1” down from the top and 1” in from the edge. Make sure you stay well clear of the glass itself.
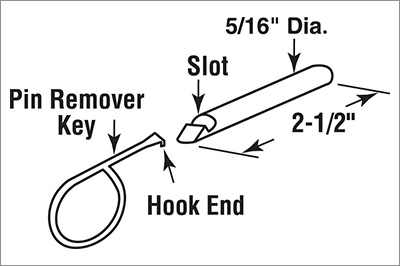
One of the more common pin sizes is 5/16” diameter. In this case, as a minimum you should use a 5/16” drill bit. For ease of use, it is better if the hole is slightly oversized. So, for a 5/16” diameter pin, you may want to use a 11/32” drill bit to provide ample clearance around the pin. Conversely, if these are basement or garage windows that you never intend to open, a snug fit is preferred. Perhaps a 19/64” drill bit will do the trick.

To utilize the pin to hold the lower window sash in the slightly open position, raise the sash about 4 to 6 inches and repeat the steps above. Again, be extremely careful that you don’t attempt to drill into the glass.
Removing Window Locking Pins on Older Homes
Double hung windows in many older homes were equipped with locking pins in lieu of modern-day clasps. If these pins have been in place for decades they could be difficult to remove. Try these steps:
Break the Seal: The pins may have been painted over several times and sealed in place. You can usually break the seal and remove the paint with an Exacto-Knife. You may need to tap the pin with a small wooden dowel or nailset to break it lose. Then try to pull the pin out with a pair of needle nose pliers.
Pry the Pin Sideways: If the pin is still stuck, place a small screwdriver on the side of the pin and pry it back and forth.
Raise the Sash: If the pin is still wedged in place, it may be that the lower sash is pulling down on it. Place a small block of wood on the window sill and every-so-gently pry up on the lower sash to align the holes. At this point the pin should come out with ease.
CAUTION:
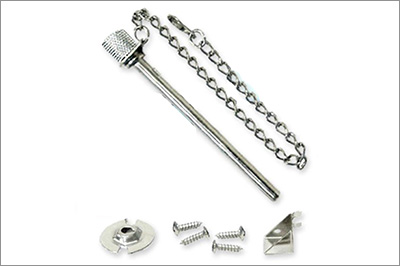
Never install fixed sash locking pins on bedroom windows where a quick escape may be necessary in the event of a fire. It is okay to use spring locked pins or easy to remove pins with a chain suspension system.

Contact Us:
Have more questions about installing sash locking pins? Contact One Source Renovation, LLC at WindowRepairGuy.com or give us a call at (815)-634-8922.