Okay let’s be honest, painted window muntins isn’t exactly something you would consider doing inside your home. But for an old, run-down garden shed, and a budget of 2 bucks, painted window muntins may be just what the doctor ordered. After all, your garden shed is likely located off in the distance in your backyard. So, from the street, nobody will ever know you simply painted on the muntins to match the style of your home. Why spend the money on authentic muntins?
Anyway, I came across this DIY video on youtube that demonstrates the step by step process to create painted window muntins for your garden shed:
Painted Window Muntins | Step by Step Instructions
Mark the Centers: Measure the width of the glass and divide by 3. This will be the centerlines of the vertical painted window muntins. For a 24” wide window the centers would be 8”. To establish the centerline of the horizontal faux muntin, measure the height of the glass and divide by 2. Using a soft pencil, mark these positions on the window frame.
Clean the Glass: The next step is this project is to clean the windows. This is a critical step if you want the paint to adhere properly to the glass. Use a clean rag and an ammonia-based cleaner that won’t leave any residue on the glass. Windex will work just fine for this project.
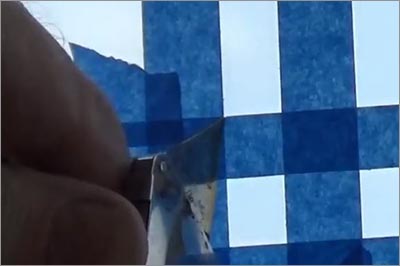
Apply Painters Tape: Apply a strip of 2-inch wide painters’ tape to one side of the aluminum strip. Line the strip up with the center marks on the window frame and press the tape against the glass. Using a sharp exacta-knife, cut the tape along the entire length of the aluminum strip. Then carefully pull the aluminum strip away from the window. After removing the aluminum strip, make sure you firmly press the remaining tape against the glass. This will ensure that the paint won’t bleed under the tape. Repeat this step for the second vertical position as well as the horizontal location.
Trim the Intersection: Use your exacta-knife to trim the tape at the intersection of the vertical and horizontal muntins. Apply a small strip of tape at the end of the muntin to mask off the window frame.
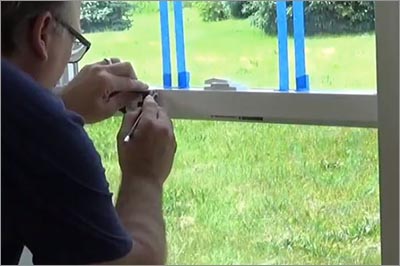
Tape the Lower Pane: Use a small square to transfer the location of the upper muntins to the lower window sash. This method will ensure that the upper & lower muntins are in perfect alignment. Accurately measure this mark from the edge of the window and mark the bottom of the lower sash with the same measurement so the aluminum template will be perfectly vertical.
Paint the Glass: Apply a thick coat of a heavy white paint such as Rustoleum, as you paint the glass between the tape guides. Allow the first coat of paint to dry completely, then apply a second quote paying close attention to areas that were lightly coated on the first pass. It will take at least 2 coats of paint to prevent the sunlight from bleeding through your painted window muntins.
Remove the Tape: Once the paint is dry to the touch, approximately one hour, you can safely remove the tape. The trick is to pull the tape away from the painted muntin at about a forty-five-degree angle.
Materials Needed for Painted Window Muntins
- White paint such as Rustoleum
- 1” wide Aluminum Strip or Aluminum Rule
- Painters Tape
- 1” Paint Brush
- Exacta-Knife
- Tape Measure & a Soft Pencil
If you’re like me, you will have all of these items in your hobby shop. So, what is the $2 for? Your favorite beverage of course. Assuming you bought a six pack of beer for $7, then consumed about 2 cans of beer for this project. Your net cost for the painted window muntins is a tad over 2 bucks. Happy painting!
Looking for professional window muntins for your home? Contact our support team at (815) 634-8922.